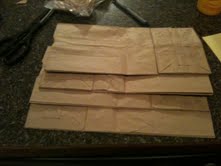
This is my second how to foldable post and today I will show you guys how to make a paper bag person. I learned this is my last GT training and thought it would be a great tool to use during character studies. The example I'm showing you uses a All about me template created by Mrs. Lemons- click link to go to her site to get the freebiehttp://stepintosecondgrade.blogspot.com/2011/07/all-about-me-posters-freebie.html. You will need a lunch size paper bag, scissors and tape.


 Step 1: Lay your paper bag flat with flap facing facing up and fold the top of the bag just like in picture.
 Step 2: unfold the top of the bag and using scissors round the corners of the fold. Next your going to cut the middle and top flap off the bag.
 Step 3: This flap will be the head of your body. You are then going to make a long cut going down the middle of the bag stopping at the bottom flap of the bag. When you get there make 2 diagonal cuts to release the arms of the bag.
 Step 4: Your almost done I promise! Now you should have a head and 2 arms on your bag. Now to the final part. Open the bottom pocket/flap of the bag. On the side you will see a square. Cut the square out on both sides. When you have finished you will need to fold the flaps back and tape them on the edges to create a pocket.

 Your paper bag person should look like this when you are done. I think I;m going to do this the first week with Mrs. Lemons All About Me Poster and hang them in my room so that way I can see how well my students can follow directions. Once they grasp how to make them I will use them for character studies. I would love to hear how you can use this foldable in your room!
Mrs. Shepherd